
Overview
The Zuper mobile app is designed for technicians and field users to manage their daily work directly from their mobile device.
Your Dashboard is the control center of the app. From here, you can:
-
View scheduled jobs
-
Adjust your schedule view (Day, Week, Month)
-
Filter jobs
-
Create new jobs
-
Add notes
-
Punch in and track time
Before using the Dashboard, you’ll need to complete the initial setup.
First-Time Setup (Before Using the Dashboard)
1️⃣ Download the App
-
Visit the Apple App Store (iOS) or Google Play Store (Android)
-
Search for Zuper
-
Download and install the app


2️⃣ Log In
-
Open the Zuper app
-
Enter your company credentials
-
Enter your email address
-
Enter your password
-
Tap Login
Once logged in, you’ll land on the Dashboard.
3️⃣ Refresh Configuration (Important for First Login)
After logging in for the first time:
-
Go to Settings
-
Select Refresh Configuration
This ensures:
-
Your app syncs with the latest system settings
-
Job types and categories load properly
-
User permissions are updated
This step is highly recommended during first-time setup.


4️⃣ Enable Offline Mode
If you work in areas with limited service:
-
Open Settings
-
Enable Offline Mode
Offline Mode allows you to:
-
View scheduled jobs
-
Add notes
-
Capture photos
-
Continue working without internet
Data will sync automatically once connection is restored.
Understanding the Dashboard
The Dashboard is your home screen and daily workspace.
From here, you can:
-
View your assigned jobs
-
Adjust the timeframe
-
Apply filters
-
Create new jobs
-
Add notes
-
Punch in for the day
Everything in this lesson happens directly from the Dashboard.

Viewing Scheduled Jobs from the Dashboard
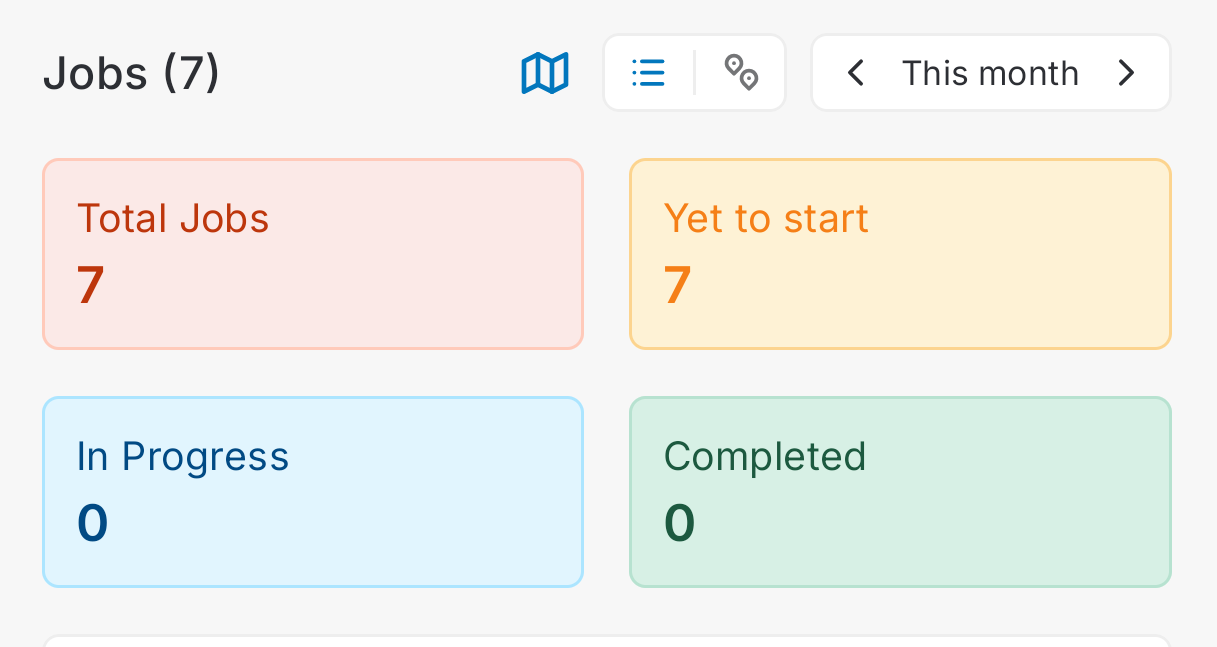
Your scheduled jobs appear directly on the Dashboard.
You can:
-
Scroll to view assigned jobs
-
Tap a job to open details
-
View job status and timing
The Dashboard eliminates the need to navigate to a separate Jobs page.
Adjusting the Timeframe (Day / Week / Month)
At the top of the Dashboard, you will see a Timeframe Picker.
This allows you to adjust your schedule view:
-
Day
-
Week
-
Month
To adjust:
-
Tap the timeframe selector
-
Choose your desired view
This helps you:
-
Focus on today’s work
-
Plan for the week
-
Review upcoming jobs
The timeframe picker only changes how jobs are displayed — it does not modify the actual schedule.
Filtering Jobs from the Dashboard
You can apply filters directly from the Dashboard to refine your job list.
Filters may include:
-
Job Type
-
Category
-
Status
-
Assigned technician
To apply filters:
-
Tap the Filter option
-
Select desired criteria
-
Apply
This allows you to quickly isolate specific types of work without leaving the Dashboard.
Creating a New Job from the Dashboard
If needed, you can create a new job directly from the Dashboard.
-
Tap Create Job
-
Select the job type
-
Enter required details
-
Save
This is useful for:
-
Emergency service calls
-
On-site upsells
-
New customer requests
Adding Notes from the Dashboard
You can add notes by opening a job directly from the Dashboard.
Once inside the job:
-
Navigate to the Notes section
-
Add your note
-
Attach photos or files
-
Save
Mobile notes allow you to:
-
Use voice-to-text transcription
-
Upload field photos
-
Record AI video (auto-transcribed into note format)
-
Tag team members for notifications
Real-time documentation improves communication and accountability.
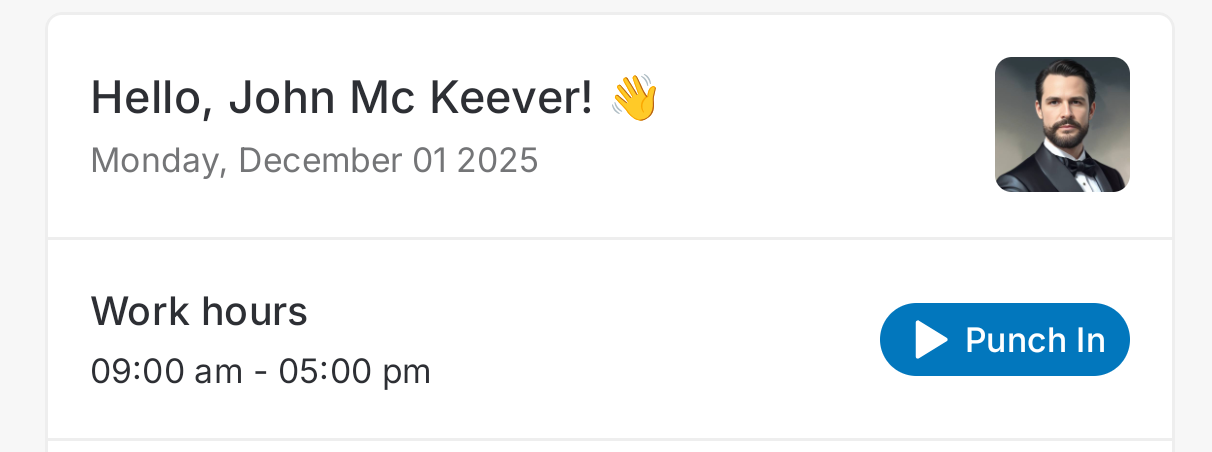
Punching In for the Day
Time tracking is accessible directly from the Dashboard.
To punch in:
-
Tap Punch In
-
Begin your workday
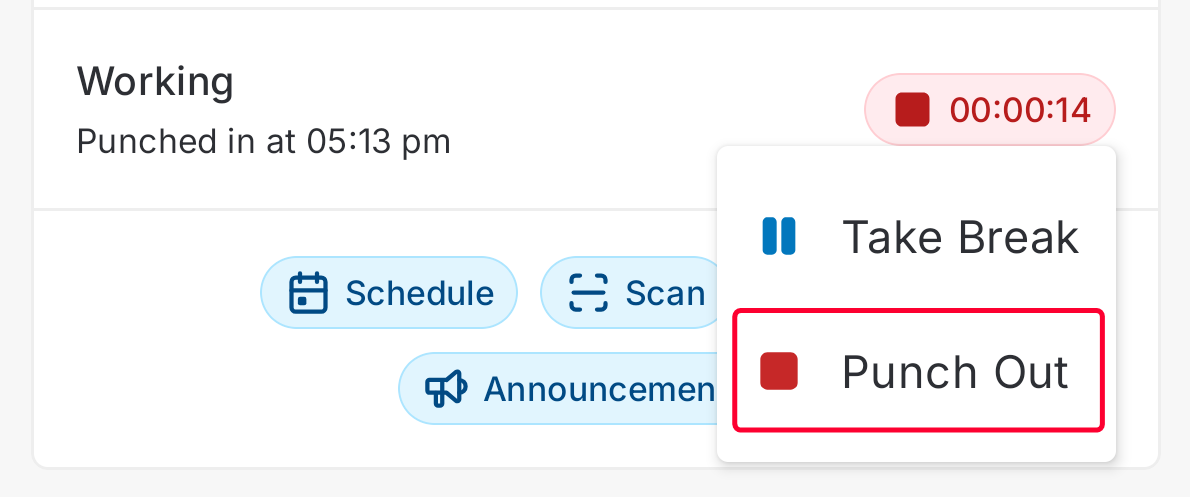
You can also:
-
Punch out
-
Track time per job
-
Review time history
Punching in ensures accurate time tracking and payroll reporting.
You can punch out for breaks as well:
Best Practices for Mobile Dashboard Use
-
Refresh configuration during first login
-
Enable Offline Mode if working in low-signal areas
-
Review your schedule each morning
-
Adjust timeframe to plan ahead
-
Punch in before beginning work
-
Update jobs and notes in real time
Support & Help
For:
-
Login issues
-
Configuration issues
-
Mobile app troubleshooting
-
Access requests